Authentication
ℹ️ BlackLab does not support user registration and login natively.
BlackLab relies on external software such as proxies to implement user authentication.
BlackLab itself relies on forwarded headers or request attributes (typically remote-user) to know who you are.
Below is an example of how to set up such a proxy to handle authentication for BlackLab.
We'll be using OAuth2 Proxy to connect to Google using OpenID Connect.
OAuth2 Proxy will sit in front of BlackLab and handle authentication, forwarding the user's email to BlackLab and the Frontend.
If you would like to use a different authentication provider, you can adapt the configuration accordingly. There is documentation and support for many providers, see OAuth2 Proxy documentation.
Create the configuration files
Create the following files in a directory of your choice, e.g. blacklab-auth:
yaml
services:
  blacklab:
    image: instituutnederlandsetaal/blacklab-frontend:4
    build:
      context: ..
      dockerfile: docker/frontend-bls.dockerfile
    volumes:
      - ./corpora:/data/index
      - ./corpora-user:/data/user-index
      - ./configs:/etc/blacklab/projectconfigs
      - ./blacklab-frontend.properties:/etc/blacklab/blacklab-frontend.properties
      - ./blacklab-server.yaml:/etc/blacklab/blacklab-server.yaml
    environment:
      - JAVA_OPTS="-Xmx4g"

  oauth2-proxy:
    image: quay.io/oauth2-proxy/oauth2-proxy # bitnami version on dockerhub doesn't support upstreams through env vars
    container_name: oauth2-proxy
    depends_on:
      - redis
    ports:
      - 80:80

    environment:
        OAUTH2_PROXY_HTTP_ADDRESS: 0.0.0.0:80
        OAUTH2_PROXY_UPSTREAMS: http://blacklab:8080/

        # Generic OpenId Connect, if you have a specific provider in mind,
        # See https://oauth2-proxy.github.io/oauth2-proxy/configuration/providers/
        OAUTH2_PROXY_PROVIDER: google

        # Change these to your own values
        OAUTH2_PROXY_CLIENT_ID: xxxxx.apps.googleusercontent.com
        OAUTH2_PROXY_CLIENT_SECRET: GOCSPX-xxxxx
        OAUTH2_PROXY_COOKIE_SECRET: thismustbe16byte # unused as we're using redis, but required anyway
        OAUTH2_PROXY_OIDC_ISSUER_URL: https://accounts.google.com/ # e.g. https://accounts.google.com/ (the proxy will automatically append .well-known/openid-configuration to this URL)
        OAUTH2_PROXY_REDIRECT_URL: http://localhost/oauth2/callback # domain is where you'll be serving blacklab-frontend/blacklab, path should always be /oauth2/callback. This is the URL you'll need to set in your OIDC provider callback setting
        OAUTH2_PROXY_EMAIL_DOMAINS: "*" # can be used to restrict access to users with a specific email domain (such as your employer or institution's domain)

        # Redis settings, these should work
        OAUTH2_PROXY_SESSION_STORE_TYPE: redis
        OAUTH2_PROXY_REDIS_CONNECTION_URL: redis://redis:6379


  redis:
    image: redis:7.0-alpine
    container_name: redis
yaml
configVersion: 2
indexLocations:
- /data/index
userIndexes: /data/user-index

# How to determine current user
# (you only need this if you want per-user private indices or authorization)
authentication:
  system:
    class: AuthRequestValue
    # attribute|header|parameter
    type: header
    # name of the attribute, header or parameter that contains the user id, for oauth2-proxy, the email is in the x-forwarded-email header
    name: x-forwarded-email
properties
# name of the attribute, header or parameter that contains the user id, for oauth2-proxy, the email is in the x-forwarded-email header
auth.source.type=header
auth.source.name=x-forwarded-email
auth.target.type=header
auth.target.name=x-forwarded-email
Create a Google Project
Other providers
For other OpenID Connect providers, the steps will be similar, but the exact configuration may vary. See the OAuth2 Proxy documentation for more details on how to configure other providers.
Google needs some info before they hand over the user information to your application.
We will need to create a Client and a Project in the Google Cloud Console.
Google will then give us a Client ID and a Client Secret that we can use in our configuration.
1. Create the project
Go to the Google Cloud Console.
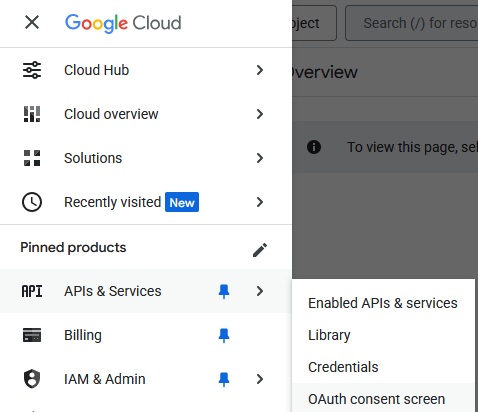
Open the menu at the top left, and go to APIs & Services > OAUTH consent screen.
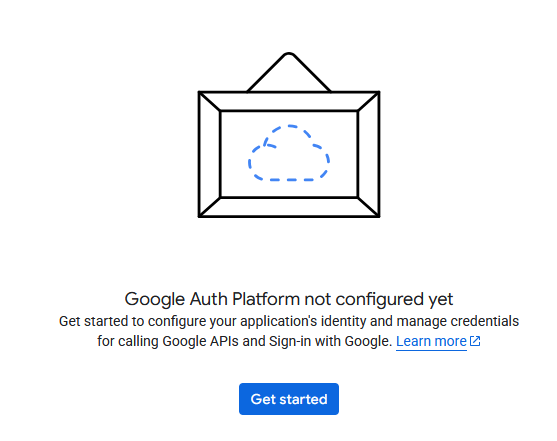
You should be prompted to create a new project if you don't have one yet.
2. Add some details
Before you can enable the login, Google needs some details.
Navigate to the OAUTH section if you aren't there: APIs & Services > OAUTH consent screen (see above for a screenshot).
You should be prompted to add some details.
3. Create the OAuth client
⚠️ IMPORTANT
Make sure to save the Client ID and Client Secret you get at the end of this step, if you lose them, you will have to create a new client.
Navigate to Clients and click Create client.

4. Add a test user
Go to the Audience section of the Google Project, and add yourself as a test user.
Until we publish the project, only test users can log in.

5. Copy the Client ID and Client Secret into the docker-compose.yml file
yml
oauth2-proxy:
    image: quay.io/oauth2-proxy/oauth2-proxy # bitnami version on dockerhub doesn't support upstreams through env vars
    container_name: oauth2-proxy
    depends_on:
      - redis
    ports:
      - 80:80

   environment:
      OAUTH2_PROXY_HTTP_ADDRESS: 0.0.0.0:80
      OAUTH2_PROXY_UPSTREAMS: http://blacklab:8080/

      # Generic OpenId Connect, if you have a specific provider in mind,
      # See https://oauth2-proxy.github.io/oauth2-proxy/configuration/providers/
      OAUTH2_PROXY_PROVIDER: google

      # Change these to your own values
      OAUTH2_PROXY_CLIENT_ID: xxxxx.apps.googleusercontent.com
      OAUTH2_PROXY_CLIENT_SECRET: GOCSPX-xxxxx
6. Try it out
Start the containers
bash
docker-compose up -dNow you can access the BlackLab Frontend at http://localhost/blacklab-frontend and the BlackLab Server API at http://localhost/blacklab-server.
You should be prompted to log in with your Google account.

7. Moving to production, using other Identity Providers, etc.
To move to production, you will need to set up a domain name and SSL certificate, and configure the OAuth2 Proxy to use that domain name. Generally you'll need to change at least the following settings:
- In
docker-compose.ymlOAUTH2_PROXY_COOKIE_SECRETto a random 16-byte stringOAUTH2_PROXY_REDIRECT_URLto your domain name, the path should still be /oauth2/callback
- In the Google Project
Authorized redirect URIsto your domain name, the path should still be /oauth2/callbackAuthorized JavaScript originsto your domain name, optionally with the path of your Frontend instance, e.g. my-domain.com/blacklab-frontend- Promote the project to production, so that other users besides your test user can log in.